Showing posts with label Android. Show all posts

HACK ANDROID PATTERN LOCK

HACK ANDROID PATTERN LOCK

Posted by Anonymous  |  at  21:22

Friends, today I m sharing a very cool and important trick that every body wants....Sometimes u forget your pattern or your cousins mobile who do not know how to reset and he goes to mobile shop and they take about 700rs...So u can now hack that forgotten pattern lock.
Follow the steps
  • Connect your mobile through USB cable.
  • ADB tool (download from here) {Note:- USB debugging must be on }PASSWORD after extraction: raipurtricks.in
About ADB
  • Android Debug Bridge (adb) is a versatile command line tool that lets you communicate with an emulator instance or connected Android-powered device. It is a client-server program that includes three components:
  • A client, which runs on your development machine. You can invoke a client from a shell by issuing an adb command. Other Android tools such as the ADT plugin and DDMS also create adb clients.
  • A server, which runs as a background process on your development machine. The server manages communication between the client and the adb daemon running on an emulator or device.
  • A daemon, which runs as a background process on each emulator or device instance.
Procedure:
Now open cmd.exe from the given tool,
  • Type
adb.exe
  • Now type the following command-
adb shell
  • Than
rm /data/system/gesture.key
  • Than reboot
Now your device will reboot and ask for new pattern lock set any about your desire enjoy...

HTC wildfire 2.2.1 root to HTC wildfire Android 2.3

HTC wildfire 2.2.1 root to HTC wildfire Android 2.3

Posted by Anonymous  |  at  01:29

Sometime ago I got an HTC Wildfire and was having loads of fun using it, but every time I wanted to do anything more  "creative" i was stopped by the binded nature of phone, hence i decided to root it (jailbreak it apple fellas) and get complete control over my device. Here, I am covering step by step guide to root HTC wildfire 2.2.1 and install Android 2.3 on HTC Wildfire.
To do the rooting you must have your Wildfire with S-OFF, HBOOT 1.02.0002 and Android 2.2.1 . You can check it by booting into HBOOT (power on your phone by holding the VOLUME DOWN + POWER button) .This method is strictly for the 2.2.1 owners. How you can turn the S-OFF is your headache, you can try the alpharev (ask the team if they can get you a 2.0 test version... :P) or you can wait for Unrevoked 3.33 or you can straight off go to market and hunt for XTC clip. Either way, try it and don't attempt to anything before you get S-OFF. Actually the notorious S-ON flag is the cause rooting wildfire is such a pain in the a**.
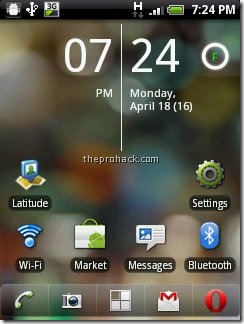
I used to have this
Android 2.2.1
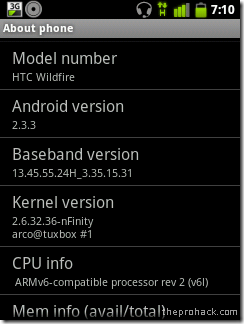
and I converted it into this :)
3
or this =)
7
Anyways, here is how you can root HTC wildfire 2.2.1 and get htc wildfire Android 2.3
What you need ?
  • HTC wildfire with S-OFF , HBOOT 1.01.0002 , OS Froyo 2.2.1
  • USB Drivers (Download)
  • RUU Rom 2.1 / RUU_Buzz_HTC_WWE_1.14.405.2_R_Radio_13.45.55.24_3.35.15.31_release_130814_signed (Download)
  • Unrevoked 3.2 Test version (Download)
  • Cyanogenmod 7 (Download)
  • Time and Patience & last but not the least,
  • Balls of Steel
    Disclaimer
    I am not responsible if your phone gets bricked, by following the process you are voiding your warranty and significant damage may be caused to your device.
    Its all for educational purposes only, if you are dumb enough to screw somewhere then I will be the one who will be laughing at you.
    Software are unpredictable in nature, one may/may not act as predicted especially in case of rooting (personal experience). Hence my friend, tread carefully.
    in short,
I AM NOT RESPONSIBLE FOR YOUR STUPIDITY.
Step 1 - Installing the USB drivers
Download USB drivers and extract them on desktop. Turn off your wildfire and boot into HBOOT by holding the VOLUME DOWN + POWER button. Connect your phone to your PC and it will show "drivers installing" or similar there for Android device. When prompted , install the drivers by going to device manager and browsing to the folder where you extracted the drivers. Once installed, disconnect and reboot your phone normally.
Now you need to install the Android bootloader interface. Connect it to your HTC wildfire to the PC and it will ask for drivers again, now go to device manager, click on unknown device,

click on update driver -> install from specific location -> No i will choose to install -> choose Android phone and click on adb interface -> click next -> when asked to install click on continue anyway, just install them.
Once done you will see your phone recognized as "Android bootloader interface". Now disconnect your phone and go into

settings -> applications - > development - > enable USB Debugging.
Congratulations, the first step is complete.
Step 2 - Downgrading from Android 2.2.1 Froyo to Android 2.1 Eclair
Download the RUU rom which is an original stock rom. Plug your phone into the PC and set it to "Charge through USB". Double click RUU rom .exe. Follow the on screen instructions and then let it install. Your phone will reboot into stock HTC 2.1 :) This will be the last time you will be seeing it though.
rom
The HBOOT version will be now 0.80.0002 (check it by powering on your phone by holding the VOLUME DOWN + POWER button)  Once done disconnect your phone.
Step 3 - Gaining root using UnrEVOked , get clockworkmod and set your phone free :)
Download the test version of unrevoked. Let me repeat, DO NOT USE UNREVOKED 3.32 as it will lead to CID errors or to be precise this error

"validation error backup cid is missing"
This may be caused as the 3.32 doesnot support HBOOT 0.82.0002. Hence You need specific test version of Unrevoked 3.2 to do the job. Download it, save it on desktop, and run it. Now connect your phone and the rooting will start. Once donw, you will have Clockworkmod recovery installed on your phone. Reboot your phone now (using the VOLUME UP/DOWN key for navigation and clicking using TRACKBALL, the POWER button takes you back in menus). Once rebooted, you will see the superuserapp in your phone and congratulations, your phone is successfully rooted :)
Step 4 - Installing Cyanogenmod 7 or Android Gingerbread 2.3.3
Download the Cyanogenmod 7 with google apps and save it on desktop, connect your phone as USB diskdrive and transfer both zip files on SD card. Once done, reboot your phone into ClockworkMod Recovery (booting by holding the VOLUME DOWN + POWER button and clicking on recovery)
Once the device boots into the ClockworkMod Recovery, use the side VOLUME buttons to move around, and either the POWER button or the TRACKBALL to select.
  • Select the option to Wipe data/factory reset.
  • Then select the option to Wipe cache partition.
  • Select Install zip from sdcard.
  • Select Choose zip from sdcard.
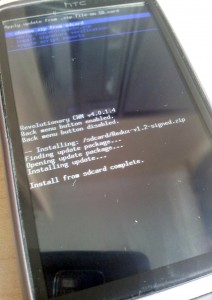
  • choose update-cm-7.0.0-buzz-signed.zip & Let it install.
  • Once done, Select Install zip from sdcard.
  • Select Choose zip from sdcard, choose gapps-gb-20110307-signed.zip
  • Once the installation has finished, to get back to the main menu by clicking the POWER button and select the Reboot system now option.
Congrats..The HTC Wildfire should now boot into CyanogenMod.
Finally rooted :)
Android terminal emulator running on superuser privileges
Enjoy Android 2.3.3 :)

Asphalt 7: Heat HD v1.0.1 Cracked Apk

Asphalt 7: Heat HD v1.0.1 Cracked Apk

Posted by Anonymous  |  at  19:28

Asphalt 7: Heat HD v1.0.1 Cracked
It’s you against the world in 60 of the most amazing cars by prestigious makers like Audi, Lamborghini and Aston Martin. A total of 150 races on tracks across the globe, from Paris to Rio, await you in 6 different game modes with local and online multiplayer for up to 6 racers.Tap into the Asphalt Tracker to find friends to challenge then share your achievements and compare stats, or you can find an opponent using the online matchmaking system. Whatever device you use, Asphalt 7 will push its limits!
Requirements: Android 2.2+
Overview: Hit the speed of heat in the fastest, most visually stunning edition of the Asphalt series.
Features:
  • 60 cars from prestigious manufacturers, like Ferrari & Lamborghini, including the legendary DeLorean
  • Beautiful graphics that push the limits of your device
  • 15 tracks set in real cities, including brand new tracks in Hawaii, Paris, London, Miami and Rio
  • Revamped online & local multiplayer (up to 6 players) with matchmaking and special events
  • Social Features: The Asphalt Tracker lets you compare stats, share achievements & challenge friends
  • Complete 15 leagues & 150 races in 6 modes! Race for the top spot and leave the rest in your dust!
 

How to root your HTC Desire and install Android 2.3 (Gingerbread)

How to root your HTC Desire and install Android 2.3 (Gingerbread)

Posted by Anonymous  |  at  08:20

Installing Redux custom ROM following rooting.

Step-by-step guide
Reasons to do this include:
  • Needing root to run certain apps. This includes taking backups, removing unwanted pre-installed apps, and installing a fix for the tiny (140 MB) internal storage on the HTC Desire.
  • Wanting an upgrade to Android 2.3 or higher. This is not available officially.
Isn’t this explained elsewhere online? Yes, but many guides are out-of-date or include unhelpful advice. I wasn’t able to find everything I needed in one place.
This will wipe your phone including apps and data.
Preparation
As well as an HTC Desire you need a Windows PC connected to the Internet and a micro-USB cable for your phone.
The custom ROM process is a bit quicker if you have a USB reader for your micro SD card.
Drivers On your PC:
  • Download and install HTC Sync. Then uninstall the HTC Sync software itself, leaving the HTC drivers in place.
  • Download and install the HTC fastboot drivers mentioned on the Revolutionary documentation.
Is it necessary to install the Android SDK for this process – using adb shell? I don’t think so. Described on this post.
On your phone:
  • Enable USB debugging.
  • Enable installing non-Market apps.

Root and custom recovery

This is a two step process: we use Revolutionary to gain S-OFF on the phone, then flashing a root zip file which gains you root. Revolutionary does not get you root by itself.
HBOOT version / erase size of 20,000 or 40,000. As we’re using Revolutionary and ClockWorkMod (CWM) does this apply? I think not.
From boot screen:
Check if PVT version is PVT4. If so check erase size.
Install Terminal Emulator from Market, then
cat /proc/mtd
Check if 20000 or 40000. If 20000 or not PVT4, we’ll use ClockWorkMod.
Check HBOOT version, this must be lower than 1.06.
On your PC:
  • Turn off your anti-virus software temporarily.
  • Download Revolutionary from http://revolutionary.io and the custom root zip file mentioned on their documentation page.
  • Connect the phone. Put the custom root zip file on the SD card.
  • Start Revolutionary. It will guide you through the process.
  • You need to get a beta key for Revolutionary – the program gives the details about your phone to generate one on the Revolutionary site.
  • The phone will restart a few times and Revolutionary will update you on progress. It’s automatic, but keep an eye on it.
  • As a final step Revolutionary asks if you want to install a custom recovery – CWM. Say ‘yes’ to this.
You now have S-OFF on the phone.
On the phone:
  • Switch off the phone, and boot into HBOOT by holding ‘volume down’ and pressing the power button.
  • The boot screen should say -REVOLUTIONARY- at the top and mention S-OFF in the next line.
  • Choose Recovery from the menu.
  • Select ‘Install zip from sdcard’ then ‘Choose zip from sdcard’.
  • Choose your root zip file, should be named Superuser-3.0.7-efgh-signed.zip.
  • Power off the phone from the CWM menu.
You now have an HTC desire with root and a custom recovery.

Custom ROM

We will use CWM to partition the SD card then install a custom ROM.
There are some dire warnings online about not partitioning an SD card with CWM, these apply to old versions of CWM and can be ignored with the current version.
This process will wipe the SD card. Copy the contents of it onto your computer first if you want to keep them.

Partition the SD card

Goal is to provide two partitions on your phone:
  • An ext4-formatted partition of 1 or 2 GB on your SD card that the phone will use as internal storage.
  • The rest of the card as a fat32-formatted partition the phone will use as regular SD card storage.
The only complication here is the ext4 partition must come second on the card, the fat32 partition must come first. CWM will handle this for us.
On the phone:
  • Boot into HBOOT by powering off and holding ‘volume down’ and the power button.
  • Go into Recovery → Advanced → Partition SD card.
  • Set the sd-ext partition to be 1 GB.
  • You don’t need a swap partition but setting one of 32 MB will not hurt anything.
  • The partitioning and formatting will take a while. Leave it be.
  • When this is done power off the phone

Installing a custom ROM

Take out the SD card and connect to your Windows PC.
Download your custom ROM of choice. There are many available for the Desire so it depends on what features you want.
I am using the SuperNova ROM which is very good. It provides Gingerbread and HTC Sense and a fairly ‘stock’ experience. Importantly, The ROM has a stable Data2SD installed that provides ample internal storage using your SD card.
Download the latest SuperNova and put it on your SD card. SuperNova instructions are here.
Quick version:
  • Shut down your phone and reboot to HBOOT.
Select Recovery, then:
  • Wipe data/factory reset
  • Install zip from sdcard → choose zip from sdcard → pick the SuperNova file.
Question: is it required to wipe cache and/or dalvik cache? Think it doesn’t hurt at the first install of SuperNova but should never be done when upgrading.
SuperNova is a big file so this process takes a while. It provides updates as it goes. Once it’s finished power off.
At first boot:
  • Allow the phone to boot, then answer all the questions asked except skip the Google account setup. Check About → Software shows the build as SuperNova.
  • Don’t restore data or apps yet. Reboot the phone.
  • At this point Data2SD runs during boot. When the phone has finished booting up, check the internal storage – it should be 900+ MB.From Recovery:

New Radio

Not the Bikini Kill song. The radio is software on the phone that allows you to make phone calls and use mobile Internet.
There seem to be incompatibilities between different Android releases, different custom ROMs, and different radio versions.
Best approach is to leave your radio alone and check if everything works with your new ROM.
  • If it does not, install the most recent radio release. SuperNova recommend you use this – version 5.17.05.23.
  • If this does not work then downgrade to version 5.09.05.30 recommended by Mo Firouz. This worked for me on Gingerbread when my current radio and the newest radio didn’t work.

Flashing the radio

This is complex. The radio as you download it cannot be loaded directly using CWM as they are only distributed in an old and incompatible format. Ignore the steps on the download page above.
You can flash the radio using fastboot. This is an insane hassle and there must be a better way, surely?
On the PC:
  • First install the Android SDK. This will take a while as the downloads are large files.
  • Download and install the HTC fastboot drivers mentioned in the Revolutionary documentation.
  • Download your radio file and extract the radio.img file from it.
  • Reboot to HBOOT then select Fastboot from the menu.
  • Connect the phone using USB. Your phone screen should update to say ‘FASTBOOT USB’.
  • At this point you can issue commands using the ADB shell on your Windows computer.
  • Open a shell in Windows using cmd.exe. Navigate to the folder containing your radio.img file.
  • Note: online guides mention setting the system PATH variable. Don’t worry about this, you can just run the fastboot program directly.
  • Find fastboot.exe – it will be somewhere in the Android SDK folder. On my 64-bit Windows 7 machine, it’s:
c:\Program Files (x86)\Android\android-sdk\platform-tools\fastboot.exe
  • Flash the radio using this fastboot command:
c:\Program Files (x86)\Android\android-sdk\platform-tools\fastboot.exe flash radio radio.img
  • Finally reboot the phone:

How To Download Android Paid Apps And Games for Free ???

How To Download Android Paid Apps And Games for Free ???

Posted by Anonymous  |  at  12:56

Assalam o Alaikum, Ali is here.As you all know today android phones are more common in our Pakistan, we can see android phone in everyones hand today.So using Android phone is very good because it can provide us very attractive and interesting application most of the applications can be downloaded for free but the really amazing one are not available for free so we thaught need to do something to download paid free apps and games.
We can Download free games and apps for android from Android Market but some of the games and apps are paid and they are more intresting but we are not interested in paying for apps cause they are just for fun so I bring a trick to download free apps and games that are paid on Android Market

Instruction:
This trick is very simple you dont need to do many things you just need to install an application on your phone the applicaton is called Black Market Alpha.Observe the proof that screen shots watch it carefully the prize of the apps are canceled with a line, that means its free.
Screenshots Of Black Market Alpha:


Don't Forget to Like my page on Facebook and Invite your Friends to Like to page, Your Like's are inspiration to us and Also Comment about the posts.

How To Root Samsung Galaxy S3 / Root Tutorial???

How To Root Samsung Galaxy S3 / Root Tutorial???

Posted by Anonymous  |  at  12:42

This tutorial will guide you through the steps to root Galaxy S3. This tutorial will help you to setup ClockworkMod recovery to the recovery partition and superuser file. Rooting Samsung Galaxy S3 is safer than S2, because in S II the recovery partition was a part of the kernel. There was high-risk of phone brick. Thanks to Samsung, they’ve followed Nexus’ way and made recovery partition separate from kernel. Thus, making it safer to root.

Warning: Even if it’s safer than S2, there are chances that your phone might brick. Root your device at your own risk.This tutorial is for GT-I9300 and GT-I9300T ONLY. Check your phone model by going to “Settings” -> “About Device” and confirm “Model Number” from there. If you try to follow this method for any other model or device, it might not work. The chances of phone brick are always there. Enough of warning. Steps to root, on your way.

What you need before starting the rooting process: 
  • A computer with Windows operating system.
  • Micro USB cable to connect your phone to system.
  • At least 50% battery charge. If you’re conservative, you can go for full charge too.
Note: If you end up Kernel panic mode, do not panic! Just run ODIN, and flash the files again.
Read the warning again. Nobody except you will be responsible for any damage to your device. Neither me, nor Samsung.
Still here?

  • Okay then, hold down the 3 keys namely, volume down, home and power button for a few seconds. Keep the position till something happens. By something I mean, your device will reset and show a screen to go into download mode.
  • Press volume increase key to enter into download mode.
  • Now you can connect your Samsung Galaxy S III to the computer via Micro USB cable.
  • DownloadGalaxyS3Root zip file. There are 3 files in the package CF-Root-SGS3-v6.1.tar, odin3 v1.85.exe and Odin3.ini. Unzip them.
  • Open device manager to confirm that you have required drivers installed. If you can see “Samsung Mobile USB CDC Composite Device” there, you’re good to go. Otherwise, you need to download Samsung Kies. Install it, and re-plug the mobile.
  • Go the files extracted in step 5. Open Odin3 v1.85.exe. You will see a window with a COM number in a box highlighted with yellow colour. The only thing matters here is the colour of the box, if it’s not yellow that means something’s not correct. You can try some tweaks like, killing Kies process from Windows task manager, re-installing drivers, rebooting system, etc.
  • Hit the ‘PDA’ button and select CF-Root-SGS3-v6.1.tar file we got by unzipping, in step 5. Then, click “Start”.
  • Just a few moments, and your phone will restart, giving you ClockworkMod recovery with root.
  • If you get “PASS” on desktop screen – cheer up! Everything is fine till now.
  • It will automatically reboot into ClockworkMod recovery and install some files.
  • After successful reboot, you will see an app named “SuperSU” in app drawer. It is the Superuser app.
  • To verify if you got root access or not, try opening an app which needs root access to function. You can try AirDroid screenshot feature, Titanium Backup, or any other app. Once you will open any such app, you will see superuser request pop-up. Grant access whenever you see this window.
That’s it! You now own a rooted Samsung Galaxy S3. To get into ClockworkMod recovery anytime, just hold the 3 keys, volume up, center home and power button for a few seconds.
Do like us on facebook!!!

How to reset pattern lock when forgotten???

How to reset pattern lock when forgotten???

Posted by Anonymous  |  at  08:51


Friends, here is a very important trick for your android phone. If you've an android phone and u have forget your pattern lock and email than don't need to hard reset.
Just follow below steps:-
Method: [adb shell method](root only)
Steps :

  • Connect ur locked Android  device in pc and open adb shell.
  • Then type the following :
su
rm /data/system/device_policies.xml
rm /data/system/gesture.key
  • Then restart the device.
Now u can unlock your device with any pattern and then in Settings u can change lock setting.

Root Galaxy Y S5360

Root Galaxy Y S5360

Posted by Anonymous  |  at  18:48

Root Galaxy Y S5360

What is rooting ? 
Rooting of a mobile is descriptive of its name itself. For any mobile phone , there are some areas you cannot see or alter . Its for the safety of the product as you may unknowingly alter it and may damage the piece. For getting complete control over the piece , we are going to take a process called rooting which makes us the complete owner of it. This process is developed by the xda developers who are best at these stuff . And they made the process for expect available even to dummies . Root means administrator.
Why root your phone ?
As i told you ,your phone is protected from you by the developer. So to install custom roms and many other stuffs , the phone is not ready as you are going to change the system files by doing it . So to bypass it , you have to root the phone . To enjoy it to the best , you have to root the phone . But be careful because rooting causes the warranty of the phone to break . So if you do this very exciting and fast , you may brick your phone and will be left nothing but a brick in your pocket . And once it is perfectly rooted , you can install custom roms , super user and in one word you would be the boss . So rooting can make a dummy into a genius .
But first you must backup the Samsung Galaxy Y data. This is being considered a risky operation and you might lose all of your personal info by performing the same. You can use our previous guides and learn how to perform a full and safe backup, or you can just click on the links from below. Also, next I have mentioned a list of tasks that must be applied before starting the proper root operation, so take your time and read everything that is listed there.
  • If you want to save the text messages, then you need to download SMS backup and restore apps for Android.
  • For the call logs, you should get suitable backup and restore tools.
  • The contacts can be easily saved if you sync with your Gmail account.
  • And you can also backup the EFS folder.
  • Also you can use a computer or SD card for saving the images and videos files.
  • A computer must also be used for the rooting operation and the Galaxy Y USB cord should be near you.
  • On both PC and handset deactivate the security options and programs like antivirus and Firewall.
  • Charge the battery of your phone.
  • Enable the USB debugging option by going to “Settings -> Applications -> Development -> USB debugging”.
  • It’s important to apply this guide only if you own the Samsung Galaxy Y model number S5360, and not similar smartphones as you can end up in bricking your Android based device.
How to Easily Root Samsung Galaxy Y S5360
  • First of all, download the root package from here and place the file on your computer.
  • Then, connect the device with the PC by using its USB cable.
  • Copy the downloaded file from the computer to the phone’s SD card.
  • Remove the USB cord and turn off the Galaxy Y.
  • Reboot by pressing the Volume UP Key, OK button and Power button together.
  • From the menu that opens select “wipe data factory reset” and “wipe cache partition”.
  • Then, select “install zip from sd card” and “choose zip from sd card”.
  • Now, just pick the downloaded package from the SD card and flash the same.
  • The process will take a while so don’t worry, just wait until it’s completed.
  • In the end select “+++go back+++” and “reboot system now”.
  • Now, download the “Root Checker” app from Google Play and see if your Galaxy Y was rooted or not.
As you can see, gaining root access for your Samsung Galaxy Y is an easy operation, performing it taking only a couple of minutes from your free time. You can use the comments area from below for sharing your impressions with us. Do tell how things worked for you or if there were problems while trying to complete the steps.

iQuran Pro v2.3.3 Apk App

iQuran Pro v2.3.3 Apk App

Posted by Unknown  |  at  17:19

Requirements: Android OS 1.6 +
Overview: Read the Holy Quran in Arabic alongside its Translation. Provides verse by verse audio playback, repeat functions, unlimited bookmarks, search, excellent navigational controls, several translations and reciters and much more.
 With iQuran Pro you enjoy:
  • Full landscape support.
  • Unlimited bookmarks.
  • Several translations.
  • A powerful full-text search engine.
  • Several downloadable recitations for verse by verse recital.
 iQuran Pro provides the following translations:
  • English & Transliteration
  • German
  • French
  • Indonesian
  • Melayu
  • Spanish
  • Turkish
  • Russian
  • Bosnian
  • Dutch
  • Italian
  • Albanian
  • Romanian
  • Japanese
 Included reciters are:
  • Sheikh Husary
  • Mishary Al-Afasy
  • Saood & Shuraim
  • Abu Bakr Ash-Shatree
  • Abdul Basit
  • Ghamdi
What's in this version:
  • [NEW] Added new Tajweed rule: Idgham without  ghunna.
  • Changed color of normal Idgham to Purple whilst Grey is now reserved for Idgham without ghunna.
  • Improved coloring of 'Ikhfa' Tajweed rule. Coloring now begins from the affected noon sakin or tanween.
Download iQuran Pro Free Here
Thanks for visiting my blog plz comment if you like my post.......Share it.......

Install Ubuntu on Andriod

Install Ubuntu on Andriod

Posted by Anonymous  |  at  22:40

A docked phone running Ubuntu
We will be running Ubuntu “chrooted” under Android OS, which just means that we will be running a “virtual” Ubuntu OS that runs on top of the Android OS.  Your Android OS will work fully (e.g. your phone will keep working normally) while the Ubuntu runs on top of it.First of all, you should have your Android device “rooted” because you need root access to run Ubuntu off your Android.
Second, your Android OS must support loop devices.  Most newer Android smartphones/tablets come with this support so we can mount our Ubuntu image as a loop device.  If not, you will either have to build your own kernel with support for loop devices or you can try an aftermarket ROM for your phone as most aftermarket ROMs come with support for it.For example, G2 Phone and Nexus One both come with loop device support so there’s no need for us to compile a new kernel for it but for others, you may have to.
Download Ubuntu from:-Download ubuntu.zip
Steps:-
  • Turn USB storage ON then copy over the Ubuntu folder to the root directory of your SD card.
  • make sure you have your Android smartphone/tablet “rooted”
  • You must have Android SDK installed or have access to adb.exe.
  • Make sure your Android phone/tablet is in debugging mode.[Go to Settings->Applications->Development and make sure USB Debugging is checked ON.]
  •  Connect your Android device to your computer via USB cable and set the USB mode to “Just Charge”.
  • Your Android device should be recognized as “ADB Device” under Device Manager.  If not, install appropriate drivers.
  • Open up a command prompt by typing “cmd” under Start->Search programs and files.
  • Browse to your SDK directory where you installed the Android SDK:
  • Then go into platform-tools directory: 
  • Type “adb devices” to double-check your Android device is recognized.
  • Type “adb shell” to enter the Android shell.
  • Then type “su” to enter super user mode, then type “cd /sdcard” and “cd ubuntu” to enter the ubuntu directory in your SD card of your Android device.
  •  Next, type “sh ubuntu.sh” to run the script which will basically get your Ubuntu image ready to run on your Android smartphone/tablet.
  • Type “bootubuntu” to enter Ubuntu.  (Next time you enter Ubuntu, you just need to type “bootubuntu” from your/sdcard/ubuntu directory, no need to run ubuntu.sh again.
If you got “root@localhost” at this point, congratulations!  This means your Android OS comes with loop device support and Ubuntu is now running “chrooted” on top of your Android OS!!!However, if you failed at this point, your Android OS probably doesn’t support loop devices, try installing another ROM or compiling your own kernel with loop device support.

Template Powered By Blogger.| Distributed by Blogger Skiller