Showing posts with label USB Pen Drives. Show all posts

How to change background image in Flash drives???

How to change background image in Flash drives???

Posted by Anonymous  |  at  12:45


  •  Open your flash drive
  •  Copy a picture in it and rename it as marveltechspot.jpg
  •   Right click and create a new Text file, open it
  •   Paste these codes:

[ExtShellFolderViews]
{BE098140-A513-11D0-A3A4-00C04FD706EC}={BE098140-A513-11D0-A3A4-00C04FD706EC}
[{BE098140-A513-11D0-A3A4-00C04FD706EC}]
IconArea_Text=0x00FFFFFF
IconArea_Image=marveltechspot.jpg
Save the file as desktop.ini
  • Save the file as desktop.ini

Create Bootable Win XP/ Win 7/ Win Vista USB Drive

Create Bootable Win XP/ Win 7/ Win Vista USB Drive

Posted by Anonymous  |  at  08:34


 windows logo
It is very common that one time or other we all be forced to boot win XP/ 7/ Vista from USB due to many problems with our DVD drives or with their firmware versions or any other reason. If you are the one who is suffering to get this things done then this post is for you.

Now you can create Windows 7, Vista, or the old XP bootable USB key with a few clicks. Yup, this is true. Read to know more!
Requirements: ►USB atleast of 2GB capacity ►ISO of of your required OS(xp/7/vista) ►10 minutes of your precious time. ►A simple APP called WinToFlash tool (free) which you can download from here.
Procedure:

  • Insert your pen drive and back up your files and folders as it will be formatted during the procedure.
  • Now execute WinToFlash tool.
  • Now follow the on screen instructions and browse to your Windows 7, Vista, or XP ISO files.
  • Now make sure your pen drive letter is correct.

 wintoflash 

  • The final step - Now press "create" button and wait for few minuets to get your bootable USB stick. 
That's it your are all set and done. From now you can boot XP/7/VISTA from your USB drive.

Use a Flash Drive as RAM Memory

Use a Flash Drive as RAM Memory

Posted by Anonymous  |  at  15:33


Use a Flash Drive as RAM Memory
Do you have a slow or old Computer? Also, do you have a USB Flash Drive? Then now you are able to extend its memory by Increasing the RAM of your Computer using the memory available on the USB Flash Drive. This stuff is a trick that Windows provided as a solution to boost a little of your RAM memory and evade those little lags that Windows produces when it runs out of RAM resource. Increasing the PC's RAM using USB Flash Drive will help also enhance games performance and decrease the time of execution of some tasks made by software.
Follow me to Use a Flash Drive as RAM Memory:
Windows XP
  • Insert the Flash Drive then Right Click on My Computer > Properties
  • Navigate to Advanced tab then click Settings under Performance section.
  • Click Advanced tab again, and click Change under Virtual Memory section.
  • Select the USB Flash Drive letter from the list, click Custom Size .
  • Set the minimum and maximum size to use in the Flash Drive (better choose same size of flash drive)
  • Press OK and Apply all settings, Restart your Computer for changes to take effect.
Windows Vista / 7
  • Insert USB Flash Drive into your computer.
  • Right Click on the USB Flash Drive > Properties
  • Navigate to ReadyBoost tab.
  • Select Use this Device and allocate the amount of memory to use (better choose around 80% of USB Flash Drive's size)
  • Click OK to apply all settings, then Restart the computer for changes to take effect

How to Format unformatable USB using CMD???

How to Format unformatable USB using CMD???

Posted by Anonymous  |  at  15:02


Format unformatable USB
Hey Friends today we will see how to format usb flash drive using MS-DOS.manny times we need to format our usb drives, people find it difficult so today reading this article you will be able to format you usb very easily,lets see the steps.
  • Click Start > Run... and type cmd in the box then Click OK
Format unformatable USB
  • The command prompt window appears.
  • Type the following command : format F:  (Replace "F" with the letter of your USB Flash Drive) And hit enter.
Format unformatable USB
  • You can also use "diskpart" to list all drive letters.
  • If you want to format it as FAT32 then type:
  • format F: /FS:FAT32
  • After typing one of the above commands, press Enter
  • When it asks for pressing Enter again, just press it to confirm.
  • It will prompt you to enter a name for the drive, write it and hit Enter

Find Your Missing USB Drive in Windows XP

Find Your Missing USB Drive in Windows XP

Posted by Anonymous  |  at  14:45

usb mising recover
Have you ever plugged in a USB drive or any external device with a hard drive and wondered why you cannot see it in My Computer?More than likely the cause is that Windows renamed the drive to a letter that is already in use. This will happen if you have several card readers, thumb drives or external hard drives attached. It will also happen if you are on a network and have mapped drives.To find the drive and then rename it, you’ll want to right-click on My Computer and select Manage.
Missing USB Drive
  • From the Computer Management screen, select Disk Management.
Missing USB Drive
  • In this window you should see all of your connected physical drives, their format, if they are healthy, and the drive letter.
Missing USB Drive
  • In this instance I am going to change the drive letter of my Lexar USB drive. Right-click on the drive in the list, and from the resulting menu select “Change Drive Letters and Paths…”
Missing USB Drive
  • Click on Change so we can change the drive letter. You might notice that you can select Add, which would let you mount the drive into a folder if you wanted to. We don’t want to, so just click Change.
Missing USB Drive
  • Select a new drive letter from the drop down list, preferably the one that you usually use for this drive.
Missing USB Drive
  • Click Yes on the confirmation screen and you are done
Missing USB Drive
  • If you have auto play enabled, you will get the normal pop up dialog asking what you want to do.
Missing USB Drive

Disable Autoplay of Audio CDs , Blank CD or DVD media and USB Drives in XP and Vista

Disable Autoplay of Audio CDs , Blank CD or DVD media and USB Drives in XP and Vista

Posted by Anonymous  |  at  14:38


Disable Autoplay


Feel bad when autoplay notification tease again and again here is simple trick to disable it (For XP)

Steps :

  • To get to the configuration screen for this setting, go to Start Menu \ Run and type in:

 gpedit.msc

  • You will see the Group Policy window. You should select Administrative Templates \ System in the tree view:

Disable Autoplay of Audio CDs , Blank CD or DVD media and USB Drives in XP and Vista

  • You will see an item in the right side pane called “Turn off Autoplay”

Disable Autoplay of Audio CDs , Blank CD or DVD media and USB Drives in XP and Vista

  • Double click the item, and set the radio button to Enabled, and change the “Turn off Autoplay on” to All Drives.

Disable Autoplay of Audio CDs , Blank CD or DVD media and USB Drives in XP and Vista

  • Now you should be safe from the autoplay monster.

Disable AutoPlay in Windows Vista
Windows Vista’s AutoPlay options are a great improvement over Windows XP in terms of flexibility, but unfortunately there are so many options that it can be confusing, especially since there’s no specific mention of USB Flash drives in the options.

  • Open your Control Panel, and then click on “Play CDs or other media automatically” to open the AutoPlay dialog.

Disable Autoplay of Audio CDs , Blank CD or DVD media and USB Drives in XP and Vista

Disable AutoPlay Globally

  • The quickest way to disable AutoPlay entirely is to just uncheck the box for “Use AutoPlay for all media and devices”, which should usually work.


Disable for a Single Type

  • You can choose a setting in the drop-down menu for a single type of drive, for instance Audio CD in this example. For this to work you’ll have to make sure to keep the global autoplay option on, and then choose the specific setting in the drop-down.

Disable Autoplay of Audio CDs , Blank CD or DVD media and USB Drives in XP and Vista

Disable for just Removable (flash) Drives

  • The problem here is that while there are settings for Audio CDs and DVDs, there’s nothing specifically for USB flash drives. Windows will determine the drive type based on the content it finds on the flash drive itself, so that’s what we’ll need to change.
  • In order to disable AutoPlay for the removable drives, you should change all of the following to Take no action: Software and games, Pictures, Video files, Audio files, and Mixed content.

Disable Autoplay of Audio CDs , Blank CD or DVD media and USB Drives in XP and Vista

Disable Through Group Policy

  • A number of readers have written in complaining that the option to disable autoplay isn’t working for them, so if you’d like to disable it entirely you can use the Group Policy editor on the Business and Ultimate versions of Vista.
  • Open up gpedit.msc through the start menu search box, browse to Windows Components \ AutoPlay Policies, and change the value of “Turn off Autoplay” to enabled.

Disable Autoplay of Audio CDs , Blank CD or DVD media and USB Drives in XP and Vista

  •  You can choose whether to disable for just removable devices, or entirely. I’m not sure if that makes any sense, however.

Disable with Registry Hack
The Group Policy editor is not available on Windows Vista Home editions, so I’ve also included the registry tweak to disable AutoPlay entirely.
Download and unzip this registry hack and then double-click on the appropriate file.

  • DisableAutoPlay.reg will disable autoplay entirely.
  • DisableAutoPlayRemovable.reg will disable autoplay on removable devices.

Disable AutoPlay of Blank CD or DVD media

  • Ubuntu will automatically launch a CD burning tool when you insert a blank data cd or dvd. This can sometimes interfere with something else you are doing right at that moment.
  • To disable this, navigate to System \ Preferences \ Removable Drives and Media:

Disable Autoplay of Audio CDs , Blank CD or DVD media and USB Drives in XP and Vista

  • Uncheck the box, and you will no longer autoplay blank discs.

How To Fix USB Not Recognized problem???

How To Fix USB Not Recognized problem???

Posted by Anonymous  |  at  14:27

Fix USB Not Recognized problem
Assalam o Alaikum! Friends today i am going tell tell the solution mother disease everyone encounter that is "SUB Device not Recognized"
Modern computers have 4 to 5 usb Ports for Mouse, key board, camera, Mobiles Digital cameras and much more. You are with this "SUB Device not Recognized"
Fix USB Not Recognized problem
Some times u think that drivers are not good and u reinstalll the drivers, but problem remains same.
You may also see in Device Manager that the device shows up as an “Unknown Device”
Fix USB Not Recognized problem
This method is not done throgh installing the new drivers or editing.Just unplug your power cable of the PC.
Fix USB Not Recognized problem
Dont just turn off your PC, unplug the power cable, because todays CPU do not turn off.
Now you think that what is relationship of power cable with this problem.
IT IS BECAUSE
Motherboard which performs all functions including usb. Sometimes the motherboard needs to be “Rebooted”. when u unplug ur cable than the small microprocessor on the motherboard reload the drivers and your USB ports should be back to recognizing all devices!

Delete Autorun.inf Virus Without Any Software

Delete Autorun.inf Virus Without Any Software

Posted by Anonymous  |  at  11:18

There are Numerous softwares available that exclusively deal with Autorun.inf and other Autorun viruses, for example ‘USB Disk Security‘. But Inspite of installing such kind of software, Sometimes you might accidentally open your USB disk Drive (Pen-drive) without looking at the warning by your Antivirus Software and thus Affecting your System with Autorun.inf virus. Once Autorun.inf gets control on your System, it will repeatedly Block any USB Scanning Software preventing it from deleting. It also Restricts you from opening hard drives on a double click.
In such cases, the Traditional Method of deleting Suspicious Programs Using Command Prompt is quite Useful. So Lets start with the Steps:
  • Open command prompt. Go to start > Run, and type “cmd” . Press enter.Type “cd\” and press enter to get to the root directory of your System.
  • Type “attrib -h -r -s autorun.inf” and press enter. This will look for autorun.inf in the selected Drive.
  • Type “del autorun.inf” and press enter. This will delete autorun.inf virus from the selected Drive.
How to Delete Autorun.inf Virus from pendrive without any Software
  • Repeat the above Steps for other drives. To navigate to other Drives, First type “cls” to clear your ‘command prompt’ then type “d:” . Repeat the Steps for all the Drives including your USB Disk Drive.
  • Restart your System.

Protect Your Computer From USB Viruses-Top 5 Security Tips

Protect Your Computer From USB Viruses-Top 5 Security Tips

Posted by Anonymous  |  at  22:13

With increasing anti-virus security in place against email-aware viruses and malware, hackers are turning their attention to less well-defended routes such as USB drives. This is the latest method that’s used by hackers to torment innocent users. However, there are ways you can protect your computer from USB and Pen drive viruses.

1.Block USB Viruses

Invest in an excellent anti-virus program that has built in USB virus scan and remover. These anti-USB virus scan programs not only protect your computer from USB Autorun viruses but can also clean worms, Trojans and viruses in your USB memory sticks.You can try anti-virus programs for USB virus such as USB Virus Scan, USB Drive Antivirus and so on.
2.Disable Your Computer’s Autorun Feature
When you plug in a USB drive stick into your system, the Autorun feature initiates automatically. If your USB contains any virus programs, it’ll use the Autorun feature to infect your computer. To protect your computer, disable the Autorun feature.You can disable the Autorun feature via the Control Panel.
Alternatively, you can use antivirus software to disable and enable the Autorun feature whenever you want. Additionally, these USB blocking softwares allow system administrators to specify which removable storage drives users can access.

3.Update Your Device Driver

Keeping your USB device driver updated is a good way to ensure greater stability for your USB drives. While this won’t help eradicate USB viruses, USB device drivers are constantly updated to block viruses and deliver timely warnings. You can update your USB device drive from your Windows Computer Management feature in the Control Panel.

4.Use USB Firewall Software

USB firewalls prevent Windows OS from processing malicious programs when a virus infected portable USB device is opened. USB firewalls monitor only your USB devices, and not your CD and DVD drives. By using USB firewalls, you’ll be enabling a basic level of protection from the autorun.inf viruses that spread from portable USB devices.

5.Always Safely Remove USB Devices

Viruses are sometimes created via damaged documents. If you are transferring a set of files to your USB drive, make sure the transfer is complete before you eject the device. Always use the Safely Remove Hardware feature of Windows OS. This is because partially transferred or damaged files can in turn corrupt other files on your USB drive.

USB Disk Security 6.2.0.18 + Crack

USB Disk Security 6.2.0.18 + Crack

Posted by Anonymous  |  at  23:40

USB Disk Security is the best software to block threats that can damage your PC or compromise your personal information via USB storage.
Benefits and Features

  • Block known and unknown threats from removable media
  • Best solution to protect offline computer
  • Prevent unauthorized persons from stealing your data
  • Compatible with other security software
  • Compatible with all popular Windows platforms
  • Fastest and lightest security software
Product Highlights
100% protection against any malicious programs via USB drive
USB Disk Security uses innovative technology to block known and unknown threats via USB drive. It supports USB drive, flash disk, secure digital card, thumb drive, pen drive, removable storage, ipod, and more.
The best solution to protect offline computer
Other antivirus software should update virus database regularly, and they cannot effectively protect offline computers that are not connected to the Internet. When new viruses, worms and other malicious attacks strike, traditional signatures are insufficient. Every minute one waits for a virus signature update creates a window of vulnerability that could have devastating consequences. USB Disk Security uses advanced proactive detection techniques, and closes the window of vulnerability left open by other reactive, signature-based responses.
Data Protection
Deliver high level of protection against theft and accidental disclosure of confidential data. This feature can prevent unauthorized persons from copying your data to USB drives, and it also can stop the threats from USB drive.
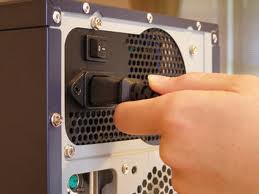
The world's fastest and lightest security software
With USB Disk Security, it's not necessary to sacrifice speed for detection and scanning. Compare antivirus software and you'll discover that USB Disk Security is by far one of the lightest applications in the industry.
Compatible with other security software and all popular Windows platforms
Incompatibility between antivirus programs is an issue; However, USB Disk Security is fully compatible with other security software. Supports Windows 7, Vista, XP, 2008, 2003.
Simple to use
USB Disk Security has been specifically designed to perform effectively regardless of the user's level of computer expertise. Just install and forget it.
Free updates
Other antivirus products should be paid for updates every year. The USB Disk Security keys are lifetime. You receive all future program updates free of charge.

Template Powered By Blogger.| Distributed by Blogger Skiller