Showing posts with label HTC. Show all posts

HTC wildfire 2.2.1 root to HTC wildfire Android 2.3

HTC wildfire 2.2.1 root to HTC wildfire Android 2.3

Posted by Anonymous  |  at  01:29

Sometime ago I got an HTC Wildfire and was having loads of fun using it, but every time I wanted to do anything more  "creative" i was stopped by the binded nature of phone, hence i decided to root it (jailbreak it apple fellas) and get complete control over my device. Here, I am covering step by step guide to root HTC wildfire 2.2.1 and install Android 2.3 on HTC Wildfire.
To do the rooting you must have your Wildfire with S-OFF, HBOOT 1.02.0002 and Android 2.2.1 . You can check it by booting into HBOOT (power on your phone by holding the VOLUME DOWN + POWER button) .This method is strictly for the 2.2.1 owners. How you can turn the S-OFF is your headache, you can try the alpharev (ask the team if they can get you a 2.0 test version... :P) or you can wait for Unrevoked 3.33 or you can straight off go to market and hunt for XTC clip. Either way, try it and don't attempt to anything before you get S-OFF. Actually the notorious S-ON flag is the cause rooting wildfire is such a pain in the a**.
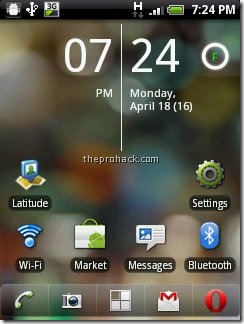
I used to have this
Android 2.2.1
and I converted it into this :)
3
or this =)
7
Anyways, here is how you can root HTC wildfire 2.2.1 and get htc wildfire Android 2.3
What you need ?
  • HTC wildfire with S-OFF , HBOOT 1.01.0002 , OS Froyo 2.2.1
  • USB Drivers (Download)
  • RUU Rom 2.1 / RUU_Buzz_HTC_WWE_1.14.405.2_R_Radio_13.45.55.24_3.35.15.31_release_130814_signed (Download)
  • Unrevoked 3.2 Test version (Download)
  • Cyanogenmod 7 (Download)
  • Time and Patience & last but not the least,
  • Balls of Steel
    Disclaimer
    I am not responsible if your phone gets bricked, by following the process you are voiding your warranty and significant damage may be caused to your device.
    Its all for educational purposes only, if you are dumb enough to screw somewhere then I will be the one who will be laughing at you.
    Software are unpredictable in nature, one may/may not act as predicted especially in case of rooting (personal experience). Hence my friend, tread carefully.
    in short,
I AM NOT RESPONSIBLE FOR YOUR STUPIDITY.
Step 1 - Installing the USB drivers
Download USB drivers and extract them on desktop. Turn off your wildfire and boot into HBOOT by holding the VOLUME DOWN + POWER button. Connect your phone to your PC and it will show "drivers installing" or similar there for Android device. When prompted , install the drivers by going to device manager and browsing to the folder where you extracted the drivers. Once installed, disconnect and reboot your phone normally.
Now you need to install the Android bootloader interface. Connect it to your HTC wildfire to the PC and it will ask for drivers again, now go to device manager, click on unknown device,

click on update driver -> install from specific location -> No i will choose to install -> choose Android phone and click on adb interface -> click next -> when asked to install click on continue anyway, just install them.
Once done you will see your phone recognized as "Android bootloader interface". Now disconnect your phone and go into

settings -> applications - > development - > enable USB Debugging.
Congratulations, the first step is complete.
Step 2 - Downgrading from Android 2.2.1 Froyo to Android 2.1 Eclair
Download the RUU rom which is an original stock rom. Plug your phone into the PC and set it to "Charge through USB". Double click RUU rom .exe. Follow the on screen instructions and then let it install. Your phone will reboot into stock HTC 2.1 :) This will be the last time you will be seeing it though.
rom
The HBOOT version will be now 0.80.0002 (check it by powering on your phone by holding the VOLUME DOWN + POWER button)  Once done disconnect your phone.
Step 3 - Gaining root using UnrEVOked , get clockworkmod and set your phone free :)
Download the test version of unrevoked. Let me repeat, DO NOT USE UNREVOKED 3.32 as it will lead to CID errors or to be precise this error

"validation error backup cid is missing"
This may be caused as the 3.32 doesnot support HBOOT 0.82.0002. Hence You need specific test version of Unrevoked 3.2 to do the job. Download it, save it on desktop, and run it. Now connect your phone and the rooting will start. Once donw, you will have Clockworkmod recovery installed on your phone. Reboot your phone now (using the VOLUME UP/DOWN key for navigation and clicking using TRACKBALL, the POWER button takes you back in menus). Once rebooted, you will see the superuserapp in your phone and congratulations, your phone is successfully rooted :)
Step 4 - Installing Cyanogenmod 7 or Android Gingerbread 2.3.3
Download the Cyanogenmod 7 with google apps and save it on desktop, connect your phone as USB diskdrive and transfer both zip files on SD card. Once done, reboot your phone into ClockworkMod Recovery (booting by holding the VOLUME DOWN + POWER button and clicking on recovery)
Once the device boots into the ClockworkMod Recovery, use the side VOLUME buttons to move around, and either the POWER button or the TRACKBALL to select.
  • Select the option to Wipe data/factory reset.
  • Then select the option to Wipe cache partition.
  • Select Install zip from sdcard.
  • Select Choose zip from sdcard.
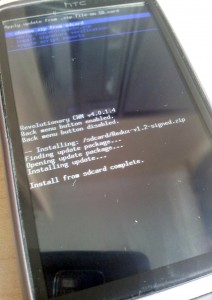
  • choose update-cm-7.0.0-buzz-signed.zip & Let it install.
  • Once done, Select Install zip from sdcard.
  • Select Choose zip from sdcard, choose gapps-gb-20110307-signed.zip
  • Once the installation has finished, to get back to the main menu by clicking the POWER button and select the Reboot system now option.
Congrats..The HTC Wildfire should now boot into CyanogenMod.
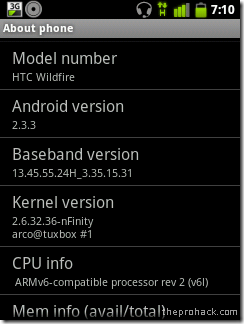
Finally rooted :)
Android terminal emulator running on superuser privileges
Enjoy Android 2.3.3 :)

How to root your HTC Desire and install Android 2.3 (Gingerbread)

How to root your HTC Desire and install Android 2.3 (Gingerbread)

Posted by Anonymous  |  at  08:20

Installing Redux custom ROM following rooting.

Step-by-step guide
Reasons to do this include:
  • Needing root to run certain apps. This includes taking backups, removing unwanted pre-installed apps, and installing a fix for the tiny (140 MB) internal storage on the HTC Desire.
  • Wanting an upgrade to Android 2.3 or higher. This is not available officially.
Isn’t this explained elsewhere online? Yes, but many guides are out-of-date or include unhelpful advice. I wasn’t able to find everything I needed in one place.
This will wipe your phone including apps and data.
Preparation
As well as an HTC Desire you need a Windows PC connected to the Internet and a micro-USB cable for your phone.
The custom ROM process is a bit quicker if you have a USB reader for your micro SD card.
Drivers On your PC:
  • Download and install HTC Sync. Then uninstall the HTC Sync software itself, leaving the HTC drivers in place.
  • Download and install the HTC fastboot drivers mentioned on the Revolutionary documentation.
Is it necessary to install the Android SDK for this process – using adb shell? I don’t think so. Described on this post.
On your phone:
  • Enable USB debugging.
  • Enable installing non-Market apps.

Root and custom recovery

This is a two step process: we use Revolutionary to gain S-OFF on the phone, then flashing a root zip file which gains you root. Revolutionary does not get you root by itself.
HBOOT version / erase size of 20,000 or 40,000. As we’re using Revolutionary and ClockWorkMod (CWM) does this apply? I think not.
From boot screen:
Check if PVT version is PVT4. If so check erase size.
Install Terminal Emulator from Market, then
cat /proc/mtd
Check if 20000 or 40000. If 20000 or not PVT4, we’ll use ClockWorkMod.
Check HBOOT version, this must be lower than 1.06.
On your PC:
  • Turn off your anti-virus software temporarily.
  • Download Revolutionary from http://revolutionary.io and the custom root zip file mentioned on their documentation page.
  • Connect the phone. Put the custom root zip file on the SD card.
  • Start Revolutionary. It will guide you through the process.
  • You need to get a beta key for Revolutionary – the program gives the details about your phone to generate one on the Revolutionary site.
  • The phone will restart a few times and Revolutionary will update you on progress. It’s automatic, but keep an eye on it.
  • As a final step Revolutionary asks if you want to install a custom recovery – CWM. Say ‘yes’ to this.
You now have S-OFF on the phone.
On the phone:
  • Switch off the phone, and boot into HBOOT by holding ‘volume down’ and pressing the power button.
  • The boot screen should say -REVOLUTIONARY- at the top and mention S-OFF in the next line.
  • Choose Recovery from the menu.
  • Select ‘Install zip from sdcard’ then ‘Choose zip from sdcard’.
  • Choose your root zip file, should be named Superuser-3.0.7-efgh-signed.zip.
  • Power off the phone from the CWM menu.
You now have an HTC desire with root and a custom recovery.

Custom ROM

We will use CWM to partition the SD card then install a custom ROM.
There are some dire warnings online about not partitioning an SD card with CWM, these apply to old versions of CWM and can be ignored with the current version.
This process will wipe the SD card. Copy the contents of it onto your computer first if you want to keep them.

Partition the SD card

Goal is to provide two partitions on your phone:
  • An ext4-formatted partition of 1 or 2 GB on your SD card that the phone will use as internal storage.
  • The rest of the card as a fat32-formatted partition the phone will use as regular SD card storage.
The only complication here is the ext4 partition must come second on the card, the fat32 partition must come first. CWM will handle this for us.
On the phone:
  • Boot into HBOOT by powering off and holding ‘volume down’ and the power button.
  • Go into Recovery → Advanced → Partition SD card.
  • Set the sd-ext partition to be 1 GB.
  • You don’t need a swap partition but setting one of 32 MB will not hurt anything.
  • The partitioning and formatting will take a while. Leave it be.
  • When this is done power off the phone

Installing a custom ROM

Take out the SD card and connect to your Windows PC.
Download your custom ROM of choice. There are many available for the Desire so it depends on what features you want.
I am using the SuperNova ROM which is very good. It provides Gingerbread and HTC Sense and a fairly ‘stock’ experience. Importantly, The ROM has a stable Data2SD installed that provides ample internal storage using your SD card.
Download the latest SuperNova and put it on your SD card. SuperNova instructions are here.
Quick version:
  • Shut down your phone and reboot to HBOOT.
Select Recovery, then:
  • Wipe data/factory reset
  • Install zip from sdcard → choose zip from sdcard → pick the SuperNova file.
Question: is it required to wipe cache and/or dalvik cache? Think it doesn’t hurt at the first install of SuperNova but should never be done when upgrading.
SuperNova is a big file so this process takes a while. It provides updates as it goes. Once it’s finished power off.
At first boot:
  • Allow the phone to boot, then answer all the questions asked except skip the Google account setup. Check About → Software shows the build as SuperNova.
  • Don’t restore data or apps yet. Reboot the phone.
  • At this point Data2SD runs during boot. When the phone has finished booting up, check the internal storage – it should be 900+ MB.From Recovery:

New Radio

Not the Bikini Kill song. The radio is software on the phone that allows you to make phone calls and use mobile Internet.
There seem to be incompatibilities between different Android releases, different custom ROMs, and different radio versions.
Best approach is to leave your radio alone and check if everything works with your new ROM.
  • If it does not, install the most recent radio release. SuperNova recommend you use this – version 5.17.05.23.
  • If this does not work then downgrade to version 5.09.05.30 recommended by Mo Firouz. This worked for me on Gingerbread when my current radio and the newest radio didn’t work.

Flashing the radio

This is complex. The radio as you download it cannot be loaded directly using CWM as they are only distributed in an old and incompatible format. Ignore the steps on the download page above.
You can flash the radio using fastboot. This is an insane hassle and there must be a better way, surely?
On the PC:
  • First install the Android SDK. This will take a while as the downloads are large files.
  • Download and install the HTC fastboot drivers mentioned in the Revolutionary documentation.
  • Download your radio file and extract the radio.img file from it.
  • Reboot to HBOOT then select Fastboot from the menu.
  • Connect the phone using USB. Your phone screen should update to say ‘FASTBOOT USB’.
  • At this point you can issue commands using the ADB shell on your Windows computer.
  • Open a shell in Windows using cmd.exe. Navigate to the folder containing your radio.img file.
  • Note: online guides mention setting the system PATH variable. Don’t worry about this, you can just run the fastboot program directly.
  • Find fastboot.exe – it will be somewhere in the Android SDK folder. On my 64-bit Windows 7 machine, it’s:
c:\Program Files (x86)\Android\android-sdk\platform-tools\fastboot.exe
  • Flash the radio using this fastboot command:
c:\Program Files (x86)\Android\android-sdk\platform-tools\fastboot.exe flash radio radio.img
  • Finally reboot the phone:

Manually Upgrade HTC Wildfire to Android 2.3 (Cyanogenmod)-Complete Guide

Manually Upgrade HTC Wildfire to Android 2.3 (Cyanogenmod)-Complete Guide

Posted by Unknown  |  at  19:23

Upgrade HTC Wildfire
We would be today explaining you how you can upgrade your HTC Wildfire to Android 2.3 (Cyanogenmod). As such HTC can only be automatically upgraded to Android 2.2, but today when even the ice cream sandwich (Android 4.0) has come up we are sure that a lot of you would atleast want a Android 2.3 version on your Wildfire. The tutorial would guide you on how to manually install a custom Android 2.3 Rom (Cyanogenmod) on your Phone.

So right here we go, follow the steps below and you would have Android 2.3 Cyanogenmod Rom on your phone running in less than 10 minutes.


Instructions:
  • Download the Latest Version of Cyanogenmod Rom by clicking here.
  • It is currently the Cyanogenmod rom V7.1.
  • Once you have finished download the Rom, you would need to copy the folder update.zip and place it on the root of the SD Card of your Phone. You can do that by simply attaching your phone to your system and copy + paste the update.zip folder to the root of SD Card.
  • Boot your Device into Clockworkmod Recovery, Once the device boots into the ClockworkMod Recovery, use the side volume buttons to move around, and either the power button or the trackball to select.
Note: You can also take a backup of your custom rom here by selecting back up option and then saving your custom rom.
  • Select the option to Wipe data/factory reset.
  • Then select the option to Wipe cache partition.
  • Select Install zip from sdcard.
  • Select Choose zip from sdcard.
  • Select the CyanogenMod update.zip.
  • Once the installation has finished, select “Go Back” to get back to the main menu, and select the Reboot system now option. The HTC Wildfire should now boot into CyanogenMod.
That’s it and you should have a CyanogenMod Android 2.3 installed on your phone.

If you find any issues following the procedure you can let us know below in comments and we would try explaining it in detail.

How to Root Htc Wildfire a3333 with unrevoked 3.21

How to Root Htc Wildfire a3333 with unrevoked 3.21

Posted by Unknown  |  at  16:42

How to Root Htc Wildfire
Android phones updates - Android smartphone users a lot of thanks to the team unrEVOked, because it has been made easier htc bootloader unlocker.
Here is the preparation of the root HTC A3333 Wildfire :
  • OS: Windows 7 x86 or windows Xp
  • Phone: HTC Wildfire A3333 (Android v1.25.405.1)
  • Applications: UnrEVOked v 3.21
  • Driver: unrEVOked modified USB driver
Preparation:
  • Go to UnrEVOked and download the application according to your OS is installed. Direct download link for Windows, Linux or MacOS
  • Windows users should download the modified driver, direct link here unrEVOked modified USB driver, unpack driver somewhere you will remember, perhaps the desktop.
Running process:
  • Connect your HTC phone, HTC Sync will be executed by istself. Press and release the icon and right click on the Sync HTC to exit the application.
  • Do not unplug the phone and make sure that the process is not running HTC.exe
  • make sure USB debugging is enabled on the phone
  • Start the UnrEVOked application, is completely automated, the entire process would involve restarting the phone number but do not worry just did not intervene for now.
  • Windows will find new hardware, let it try to install, when it fails just install it manually by selecting the path to the driver you just downloaded the modified unload
  • Open device manager and check the proper driver installation on Android> Android Bootloader Interface
  • At the last step you have {done} a message at the bottom of the application UnrEVOked, it's time to check the phone screen
  • Disconnect the phone or just choose the [system reboot now] from the menu displayed on the phone
  • After restart HTC Wildfire is rootedHTC Wildfire
Function keys:
  • Volume [+ / -] is for the menu up / down navigation
  • Power / screen-lock is to return to the top menu
  • Pressing  the optical trackpad as the action to the menu / execute
Other :
Supported devices:
  • HTC Aria
  • Sprint EVO 4G (HTC Supersonic)
  • HTC GSM
  • Droid Incredible (HTC Excellent)
  • Desire CDMA (HTC BravoC)
  • Droid Eris (HTC DesireC)
  • HTC Wildfire (HTC Buzz)

Template Powered By Blogger.| Distributed by Blogger Skiller